After twelve years behind the service counter at a bike shop, I’ve seen it all. I’ve seen parents come in with a "bargain" rack they bought online, trying to mount a seat onto a frame that wasn't designed for it. I’ve seen loose, dangling helmet straps that would do absolutely nothing in a tumble. And, most memorably, I’ve had to gently but firmly explain the physics of why a trailer isn't a toy.
Now that I’ve transitioned into parenting journalism, my mission remains the same: I want to keep your precious cargo safe. Whether you are using a trailer, a rear-mounted seat, or a high-end cargo bike, crossing intersections with children is the single most stressful part of the commute. Let’s break down how to do it with confidence, technique, and the right gear.
The Essential Question: Are They Ready?
Before we talk about intersections, we have to talk about the passenger. I ask every parent who walks into my shop the same thing: "Can your baby hold their head up for the whole ride?"
It sounds simple, but it is the golden rule of child cycling. If your child cannot support their own head while wearing a helmet, they are not ready for a bike seat. The extra weight of the helmet, combined with the vibrations of the road, puts undue strain on a developing neck. If your child toddler bike seat age is still in that "bobble-head" stage, a trailer with a proper infant sling—and definitely a slow, gentle pace—is the only way to go, and even then, check with your pediatrician first.
Age-by-Age Options: Choosing Your Gear
There isn't a "one size fits all" solution. Your choice of carrier should evolve with your child’s growth.
- Infants (Under 1 year): Generally, this is trailer territory. Use a high-quality infant insert that provides lateral head support. Keep rides short and on smooth surfaces. Toddlers (1–3 years): Rear-mounted seats or mid-tail cargo bikes are excellent here. They allow for interaction and help the child learn to "lean" into turns. Preschoolers (3–6 years): Front-mounted seats or long-tail cargo bikes with sturdy rails provide the child with a great view and keep their center of gravity low.
Installation and Compatibility: Don't Skip the Manual!
This is where I start getting annoyed. I cannot https://smoothdecorator.com/can-i-ride-with-two-kids-the-ultimate-guide-to-the-bike-train-setup/ tell you how many parents skip the manual because "it looks easy." Please, read the manual.
Your owner’s manual isn't just paper—it’s your legal and safety guide. When you are mounting a seat to a rack, you must respect the manufacturer's torque guidance. If a bolt needs 5 Newton-meters of torque, use a torque wrench. Using a "questionable rack" that isn't rated for the weight of your child and the seat is a recipe for disaster, especially when you hit a bump at an intersection.
Always check for:
Frame Compatibility: Is your seat frame mount actually compatible with the bike's tube diameter? Heel Clearance: If your seat is mounted, can you pedal without hitting it? If you have to pedal awkwardly, your control at a stoplight will be compromised. The Stability Check: Once installed, give the seat a firm shake. If the whole bike moves, it’s secure. If the seat moves independently of the frame, you have work to do.Helmet Fit: The Two-Finger Rule
Nothing grinds my gears like a loose helmet strap under a baby’s chin. I’ve seen kids arrive at the shop with helmets pushed back like a baseball cap, exposing their forehead. That helmet might as well be an accessory, not a safety device.
Let’s count those clicks together. When I secure a helmet, I do it out loud: "Click, one. Click, two." Here is the checklist I use every time:
- Two-Finger Rule: You should only be able to fit two fingers between the strap and the child's chin. Any more, and the helmet will fly off in an impact. The V-Shape: The straps should form a tidy "V" under the ears. Not over them, not flapping around. The Forehead Test: The helmet should sit two finger-widths above the eyebrows. If it’s sitting higher, the frontal bone is exposed.
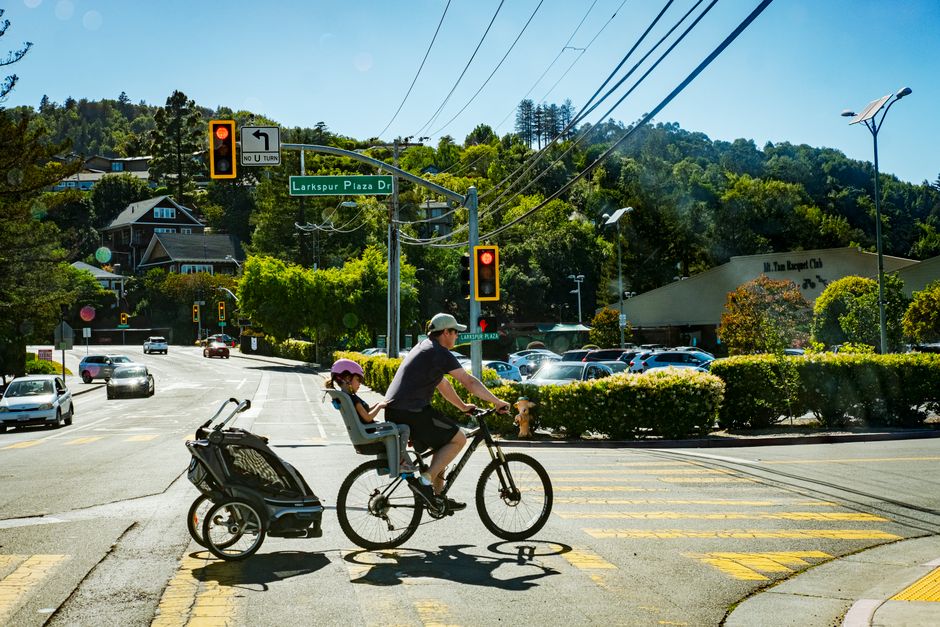
Intersection Safety: Take the Lane vs. Walk Bike Option
Intersections are where the most "close calls" happen. Right-turning vehicles often don't check for cyclists, and left turns across traffic are notoriously dangerous.
1. Take the Lane (The Assertive Approach)
When you have a kid on the back, you are a vehicle. You have a right to be on the road. If the intersection is narrow or has a high volume of turning traffic, take the lane. By moving toward the center of the travel lane, you prevent cars from trying to squeeze past you in the "door zone" or cutting you off as they turn right.
2. The Walk Bike Option (The Defensive Approach)
If you are in an intersection that feels chaotic, or if your child is particularly squirmy, there is no shame in using the walk bike option. Hop off, engage your brakes, and use the crosswalk as a pedestrian. It’s better to add 30 seconds to your commute than to risk a high-speed interaction with a distracted driver.
3. Visibility is Life
Always assume you are invisible. Use high-lumen blinkers (front and rear) even during the day. If you have a trailer, put a bright, tall safety flag on it. That flag is usually the first thing a driver sees over the hood of their SUV.
My Pre-Ride Checklist
I keep a tiny checklist on my phone, and I go through it every single time before I push off the driveway. It takes 60 seconds, and it saves lives.
Category Checklist Item Helmet Two-finger gap check? Seat/Trailer Straps buckled and tight? Bike Tires inflated properly? Mounts Check all bolts/quick releases for tightness. Child Are they alert and comfortable?Final Thoughts
Cycling with your children is one of the greatest joys a parent can experience. It turns a mundane errand into an adventure. However, the intersection is not the place for guesswork. Be deliberate, be visible, and for heaven's sake, tighten those straps!
Remember, if you are ever in doubt about your setup, take it to your local bike shop. A good mechanic will be happy to help you double-check your work—and they’ll probably appreciate that you didn't just ignore the manual. Now, go get out there and enjoy the ride!